How to Safely Trim Your Cat’s Nails By Yourself

Any cat owner will tell you that trimming your cat’s nails is a must on a regular schedule to prevent scratching. How to trim your cat’s nails? Attempting this on your own may seem impossible to start with, but there are several things you can do to make the process much easier.
We’re going to outline how to trim cat nails, the tools you need, how you get your cat acquainted with the clippers, and much more. The goal of this post is to take some of the anxiety of out trimming your cat’s nails, so it’s an enjoyable experience for both of you.
Different Types of Cat Nail Trimmers
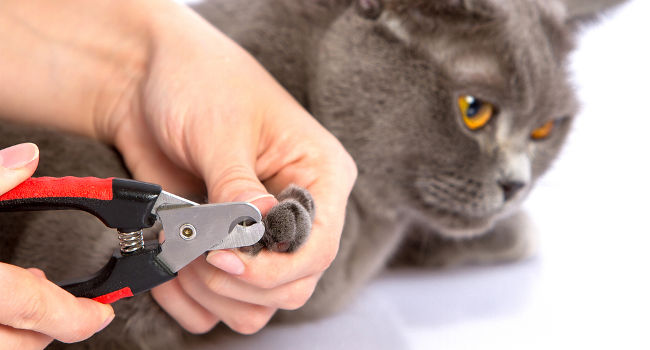
There is more than one type of cat nail trimmer available, and this can be an overwhelming problem if you have no idea what you’re looking at. It may take a little trial and error before you find the type of clippers that work best for your cat, but the four categories are:
- Guillotine: Guillotine nail trimmers have two blades with a hole in the middle that snip together when you push the handle. They’re slightly larger, but they snip the nail quickly once you get it in position.
- Grinder: Nail grinders are popular with cat parents who are afraid of cutting the quick and who want to get a rounded edge. They feature fine-grit sandpaper that slowly grinds layers of your cat’s nails off to a smooth edge.
- Pliers: Pliers are a style of nail trimmer that has more durable blades and handles that are capable of cutting thicker nails. You’ll get two blades that look like scissors with a slightly rounded edge.
- Scissors: Scissor nail trimmers feature two three or four-inch blades with rounded edges that snip the ends of your cat’s nail away. They usually have two small loops to put your fingers through on the handle.
Getting Your Cat Comfortable with Trimming Their Claws
Once you decide on a type of clippers for your cat’s nails, you can work on slowly getting them comfortable with the idea of cutting their nails. Ideally, you want to start this process when your cat is young.
Introduce the Clippers
Wait until your cat is relaxed and laying in their favorite spot before you introduce them to the clippers. You may want to bring a treat and set the clippers in front of your cat before setting the treat on top of the clippers to help the cat associate the clippers with good things.
Make sure that there are no other animals or people nearby when you attempt this because you want her attention focused on the clippers. Praise her and pet her throughout the process, and repeat this step several times over the span of a few days until she doesn’t mind seeing them.
Touch Your Cat’s Paws

Get your cat used to touching and holding their paws over the span of several days because most cats don’t like their feet touched. Gently hold your cat’s paw while letting her pull away if she so chooses.
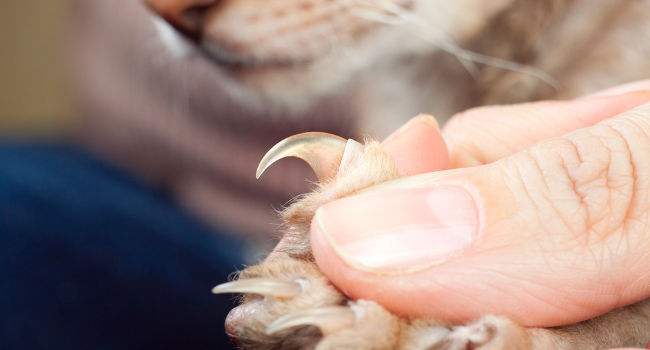
Apply gentle pressure to your cat’s toes to make her claws come out. Most cats have their claws sheathed, and it takes a gentle bit of pressure for them to extend their claws. Do this to a different toe each day, and praise your cat or give them a treat each time they allow you to do it.
Look for the Quick

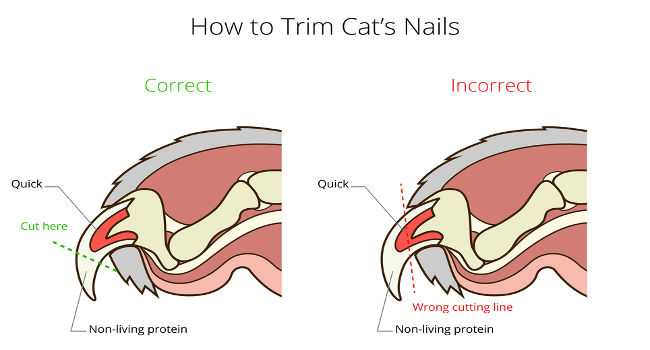
The quick in your cat’s claws is a blood vessel, and you want to avoid cutting this area when you trim their nails because it can bleed and cause pain. Once your cat’s claws are out, look and see if you can see the pink area.
You want to concentrate on cutting the part of your cat’s claw that doesn’t have this blood vessel in it, and it shouldn’t be too hard because most cats have white or clear nails. If you do cut it, it’ll heal by itself.
Cutting Your Cat’s Nails
Now that your cat has had time to get used to you handling their feet and the clippers, it’s time to cut their nails. Ideally, you want to do this every four to six weeks to keep them short and healthy. When you get on a schedule, it’ll get easier for you to trim their nails each time you do it.
Position Your Cat and Cut the Nails
You can start by putting your cat in your lap with them facing away from you if that’s where they are most comfortable. Once you have your cat in a position that works for you, you can choose a foot to start with and massage their toes until the nails start to come out.
Take a look at you cat’s claw and look for the quick because this is the area you want to avoid accidentally snipping. Position your clippers halfway between the quick and the tip of the claw before you snip it away, and cut it in one clean movement to prevent splintering or cracking.
Continue this pattern until you finish trimming all of your cat’s front nails, and stop to take a break if your cat has enough partway through. Most cat owners don’t need to clip their cat’s back claws because they’re usually worn down and nicely rounded out just by your cat going about their day.
Things to Avoid Doing When You Clip Your Cat’s Nails
First, you never want to clip your cat’s nails before introducing them to the clippers and getting them used to the whole process first. This can cause your cat to be afraid, and a fearful cat can either lash out or hide.
You never want to cut your cat’s claws at an angle either because this makes them very prone to splintering, cracking, or having jagged edges that catch on things when your cat walks around. Instead, try to cut your cat’s nails straight across in one clean motion to get an even edge.
You also don’t want to raise your voice or punish your cat if they can’t or won’t sit still long enough to get all of their nails cut in one go. This can cause your cat to associate negative things with getting their nails trimmed, and they may resist even more the next time you try it.
Bottom Line
Trimming your cat’s nails can be an excellent time to bond with your cat if you do it correctly, but it takes time and patience on your part to get your cat ready for it. Now that you know how to trim cat nails, you can follow our technique and see what works best for your feline friend.
You can find more info at: http://www.dermoscent.com/en/our-advice/fiche-should-you-trim-your-cats-claws-_164.html
